


Introduction:
Amazon Web Services (AWS) offers a plethora of services to facilitate the deployment and management of applications in the cloud. One such essential service is Elastic Load Balancing (ELB), which ensures the distribution of incoming traffic across multiple targets to enhance the availability and fault tolerance of your applications. To achieve this, AWS introduces the concept of Target Groups. In this blog post, we'll guide you through the straightforward process of creating a Target Group in AWS.
Step 1: Sign in to the AWS Management Console
To get started, log in to your AWS account using the AWS Management Console. If you don't have an account yet, you can easily sign up for one.
Step 2: Navigate to the Elastic Load Balancing (ELB) Service
Once you're logged in, locate and select the "Services" dropdown in the top-left corner of the console. From the extensive list of AWS services, find and click on "EC2" under the "Compute" section. Within the EC2 Dashboard, choose "Load Balancers" from the left navigation pane.
Step 3: Create a New Load Balancer
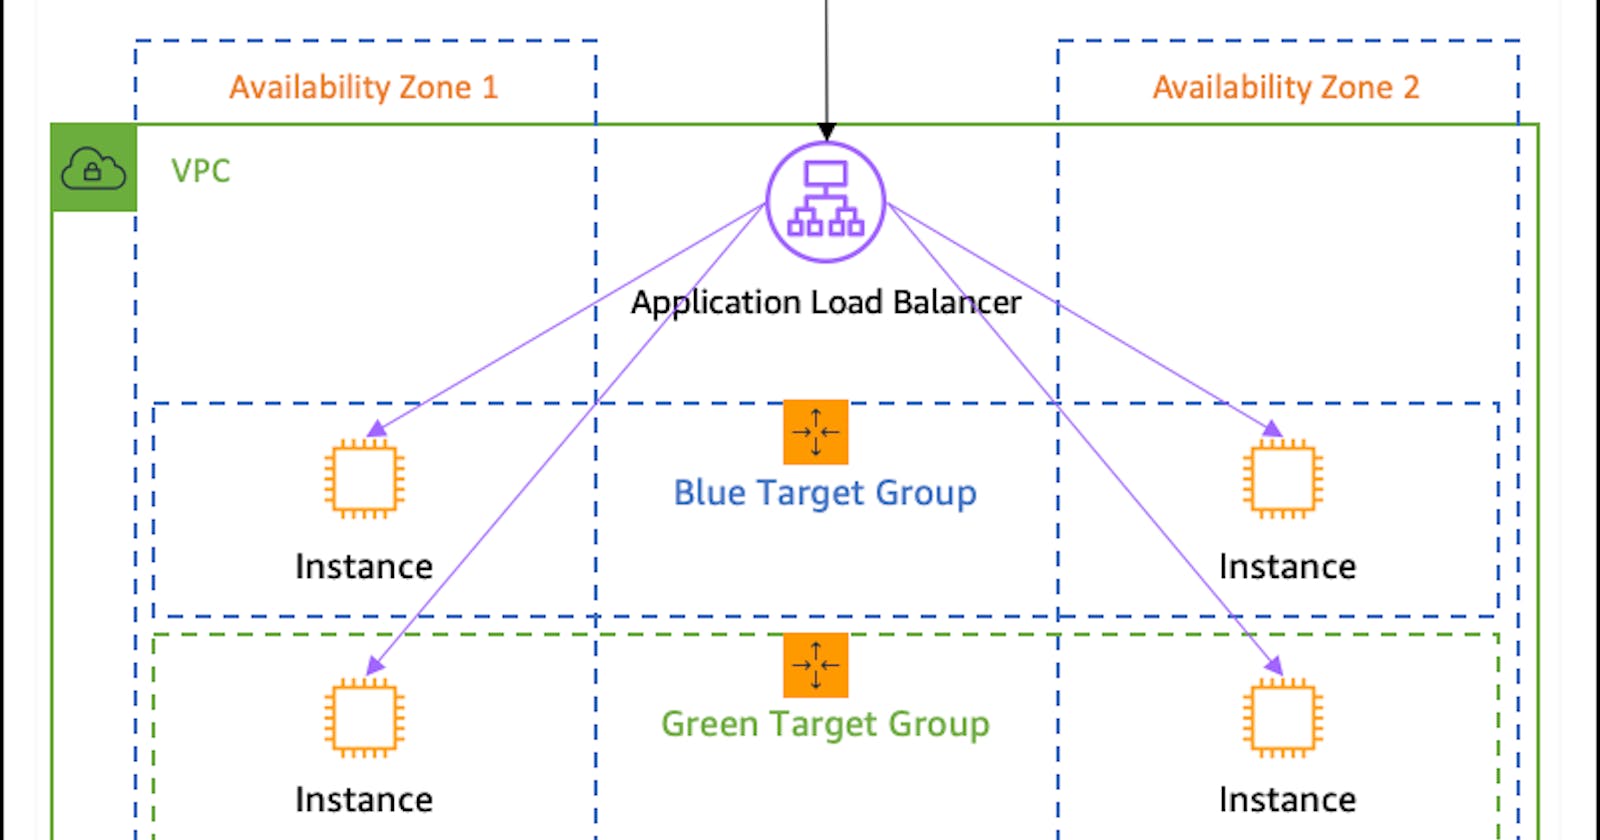
To create a Target Group, you first need to set up a load balancer. Click the "Create Load Balancer" button and choose the appropriate type based on your requirements (Application Load Balancer or Network Load Balancer). Follow the on-screen instructions to configure your load balancer settings, including listener configurations and security settings.
Step 4: Configure Target Group
After creating the load balancer, navigate to the "Target Groups" tab. Click on the "Create Target Group" button.
Name and Protocol: Provide a meaningful name for your Target Group and choose the protocol (HTTP, HTTPS, TCP, or UDP) based on your application's needs.
Port: Specify the port on which your targets will receive traffic.
VPC: Select the Virtual Private Cloud (VPC) in which you want to create the Target Group.
Health Checks: Configure health checks to ensure that the targets are functioning correctly. Set the protocol, path, and response timeout values.
Targets: Define the targets by adding instances, IP addresses, or Lambda functions.
Step 5: Review and Create
Once you've configured the Target Group settings, review your choices to ensure accuracy. Click the "Create" button to finalize the process.
Step 6: Associate Target Group with Load Balancer
Go back to the "Load Balancers" tab, select your load balancer, and click on the "Listeners" tab. Edit the listener rules to associate the Target Group you just created with the appropriate conditions.
Conclusion:
Creating a Target Group in AWS is a fundamental step in optimizing the performance, scalability, and resilience of your applications. By following these easy steps, you can successfully set up a Target Group and integrate it with your load balancer, ensuring a seamless and efficient distribution of traffic to your application targets. AWS's user-friendly interface and step-by-step guidance make the process accessible even for those new to cloud services. Happy cloud computing!